UFW and 2FA for SSH – Don’t you love TLA’s?
sudo apt-get install ufw
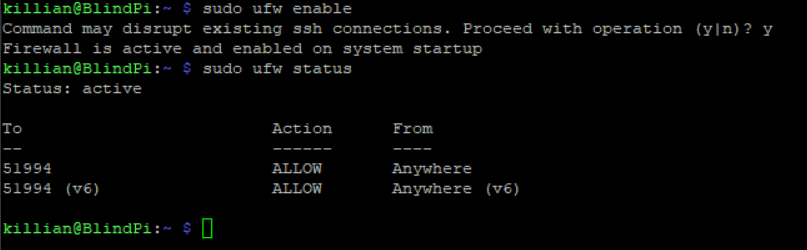
After that is installed we need to add a new rule to our super secret port and deny all other inbound traffic. (Spoiler alert, you can see my super secret port)
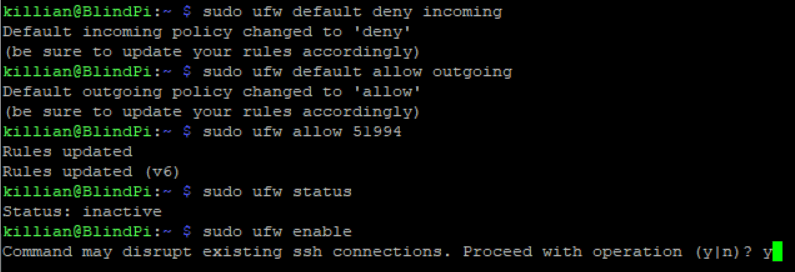
That ran and I am still connected – good sign!
Now onto 2FA!
For this, I will be using Google’s Authenticatior to add an extra layer of security for external connections. I will not require it for LAN connections – just to make things easier (difficult?)
sudo apt-get install libpam-google-authenticator
Run through the setup and say yes to everything except allowing old codes to be used
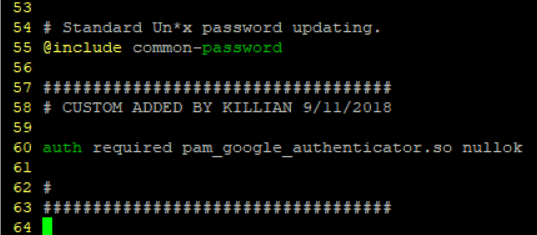
After this, we need to tell pam to use google’s authenticator
sudo vim /etc/pam.d/sshd
add auth required pam_google_authenticator.so nullok to the end of the file
Save it and move onto to sshd_config
sudo vim /etc/ssh/sshd_config
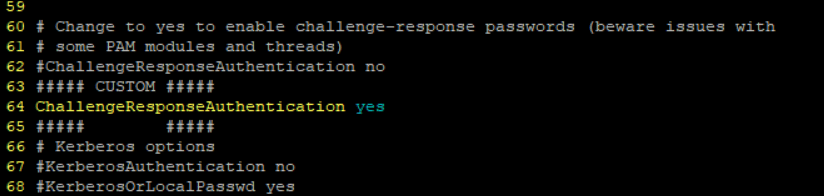
Find ChallengeResponseAuthentication and change it from no to yes. (For this I decided to copy the line, comment it out, and make a new line with my changes.
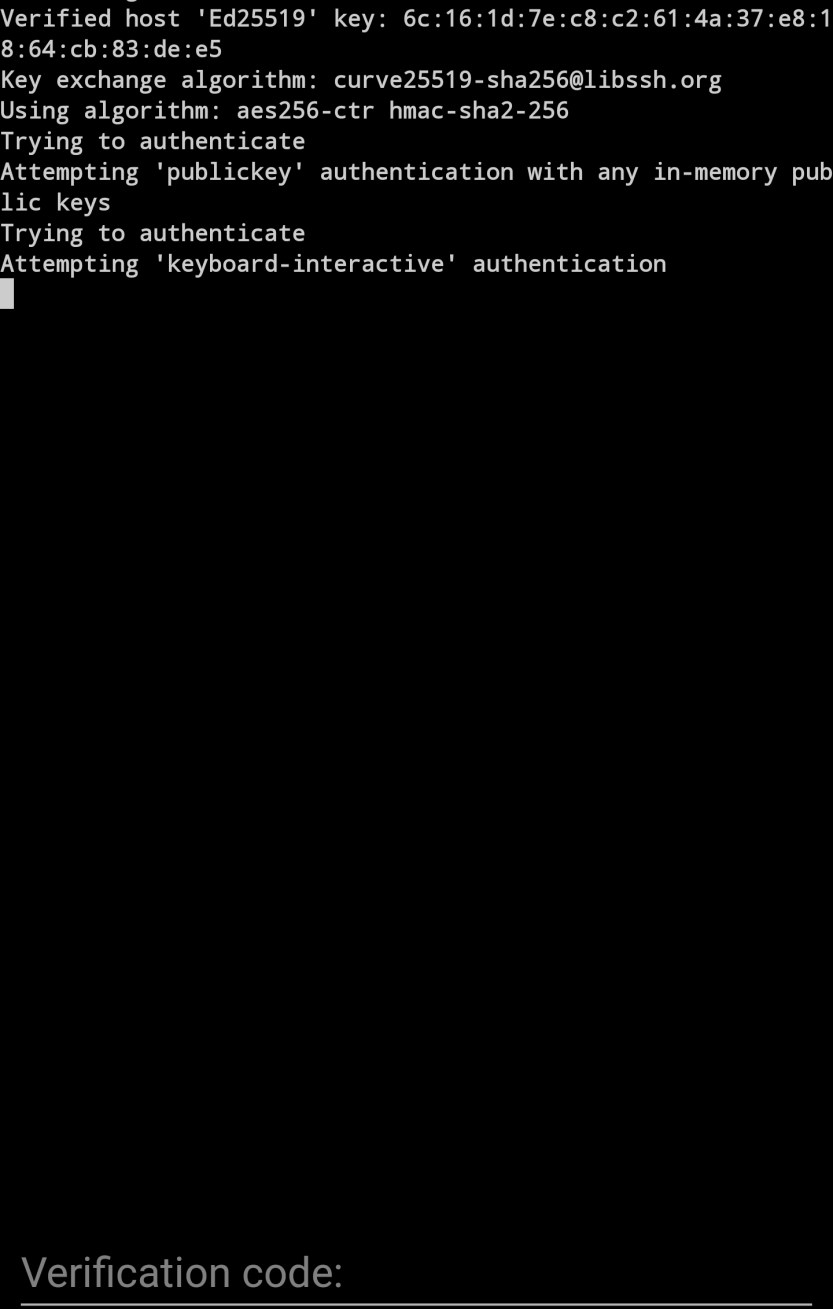
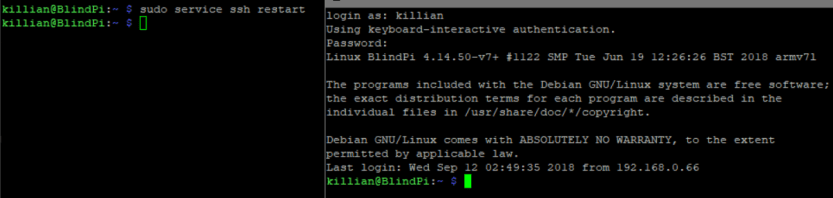
Now to save the file – restart the service – and try to connect
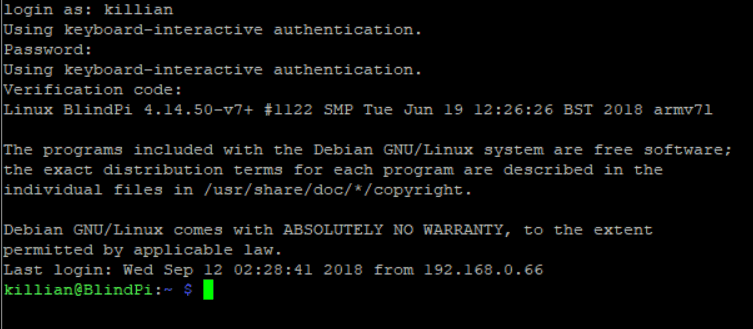
Success! it requires a verification code!
Now that I know it works, it’s time to allow connections from my LAN with no key required.
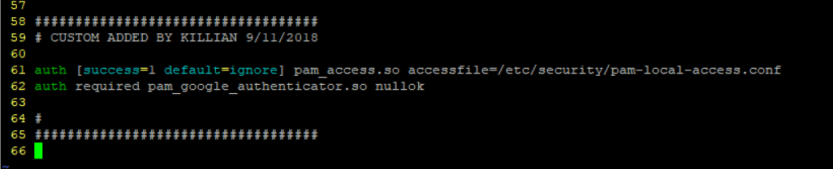
in /etc/pam.d/sshd I added the following
auth [success=1 default=ignore] pam_access.so accessfile=/etc/security/pam-local-access.conf
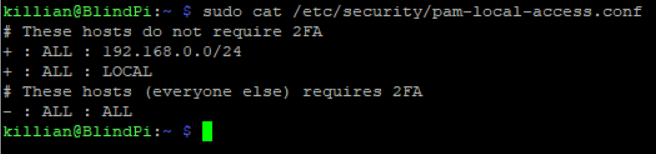
Now I need to create the file /etc/security/pam-local-access.conf and add the hosts to exclude.
Now to restart ssh again and make sure the connection still works and that 2FA is not required locally. Then test it remote.
Looks good locally!
To check from external I am just going to use connectbot on my phone and try to log in.
Before that though, I need to forward a port quick. (I need to use a different super secret port for uhh… reasons 🙂 ) 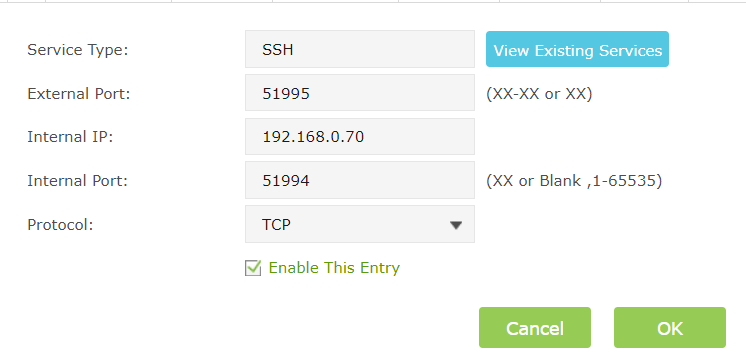
Success!